I have been working on building the perfect 3D printer. I’ve only been at it for about five years.
My side business, Frykin Industries (DBA Fitz Prints), started out aimed at building custom 3D printers. In my first year I picked the Voron 2.4 as a base. The goal was something I could build, sell, and service.
That comes with a lot of caveats. A Voron is a hobbyist printer, and it’s expensive. The value prop is that it’s not throwaway. In the true RepRap spirit, it can be built from off-the-shelf parts, and it’s always open and serviceable by the end user.
This is the printer I’m talking about. Its name is Bumblebee.
The first layer problem
I’ve built almost 10 of these machines and sold two. It was a start, and it was fun. But there were a lot of problems, and most of them came down to reliability.
On the stock 2.4, the Afterburner was a fine toolhead. The Clockwork 2 extruder was Bondtech-like. Cooling was somewhat mediocre. But almost immediately I hit the real challenge: bed adhesion and the first layer. Pretty much every print had to be watched, because the Omron sensor just… sucked. Readings were inconsistent, and it melted quickly from the heat coming off the heat break. For people paying for a premium experience, babysitting every print is not acceptable.
Over the next year I tried different approaches to fix the first layer. Klicky was a mod that used a click switch on a magnet, picked up and dropped off by the toolhead. Novel, and it helped, but never good enough. Then came Voron Tap, which uses the nozzle itself as the sensor. That introduces nozzle cleaning as a requirement, because the probe is also where the plastic comes out.
Then Bambu happened
All of this was happening against the backdrop of the industry. After my first year of prototyping, Bambu Lab launched the X1C. That was an oh-shit moment.
It was immensely validating, because I was going after a market that needed attention. But that machine was light years ahead of anything I was thinking about. Built-in CAN, filament changing, lidar for pressure advance, and, wouldn’t you know it, it was fast.
Pretty much everyone I knew bought one. So did people I didn’t. The demand was for printers for people who want to print, not people who want to mess with printers. Overnight my business idea went up in flames. The printer I wanted to sell was right in front of me for a third of what it cost me to put one together.
For a lot of reasons, I never gave up on it. I kept working to make my Vorons excellent, because what Bambu had was lock-in. If something failed, the answer usually wasn’t a fix. It was a replacement. Bambu became the baseline. The Voron has to meet or exceed it.
Fast forward a few more years. The Vorons are still R&D machines, and I still want my investment of time and knowledge to be worth something. I bought a few Bambus myself, and kept working on the Vorons.
Unlock number one: Cartographer
Several months ago, the first real unlock came along: a Cartographer v3 scanner. It’s an eddy current probe that’s supposed to be the answer to first layer problems. Why take 15 probe points when you can take 150 in an eighth of the time of a traditional probe? Yes please.
I finally found the time, plus a new toolhead board (the Nitehawk-36 v2) with a USB hub on it to carry the scanner. It was a success. First layers have never looked so good.
In the middle of the Cartographer install, a lot else changed. I’ve been chasing print quality as much as first layer reliability, so the whole machine got a CNC uplift: CNC Z drives, CNC gantry, CNC A/B drives. If Chaoticlab sold a CNC upgrade for the Voron, I did it.
The result is an all-metal machine, and it was printing a dream. For the first time since I started building printers, I had one I could trust with random jobs without watching it. First layers were amazing every time, and the quality was chef’s kiss.
Blob of death
Fast forward to recently. My father-in-law passed, and I suddenly had a job building out custom engraved bullet casings for his funeral. I got about 80% of the way through, and then something bad happened.
At that point the toolhead was a CNC Sherpa Mini extruder on a Xol toolhead. Good stuff. But my trust in the machine got me this: I sent off a job to print a bullet holder and got the blob of death.
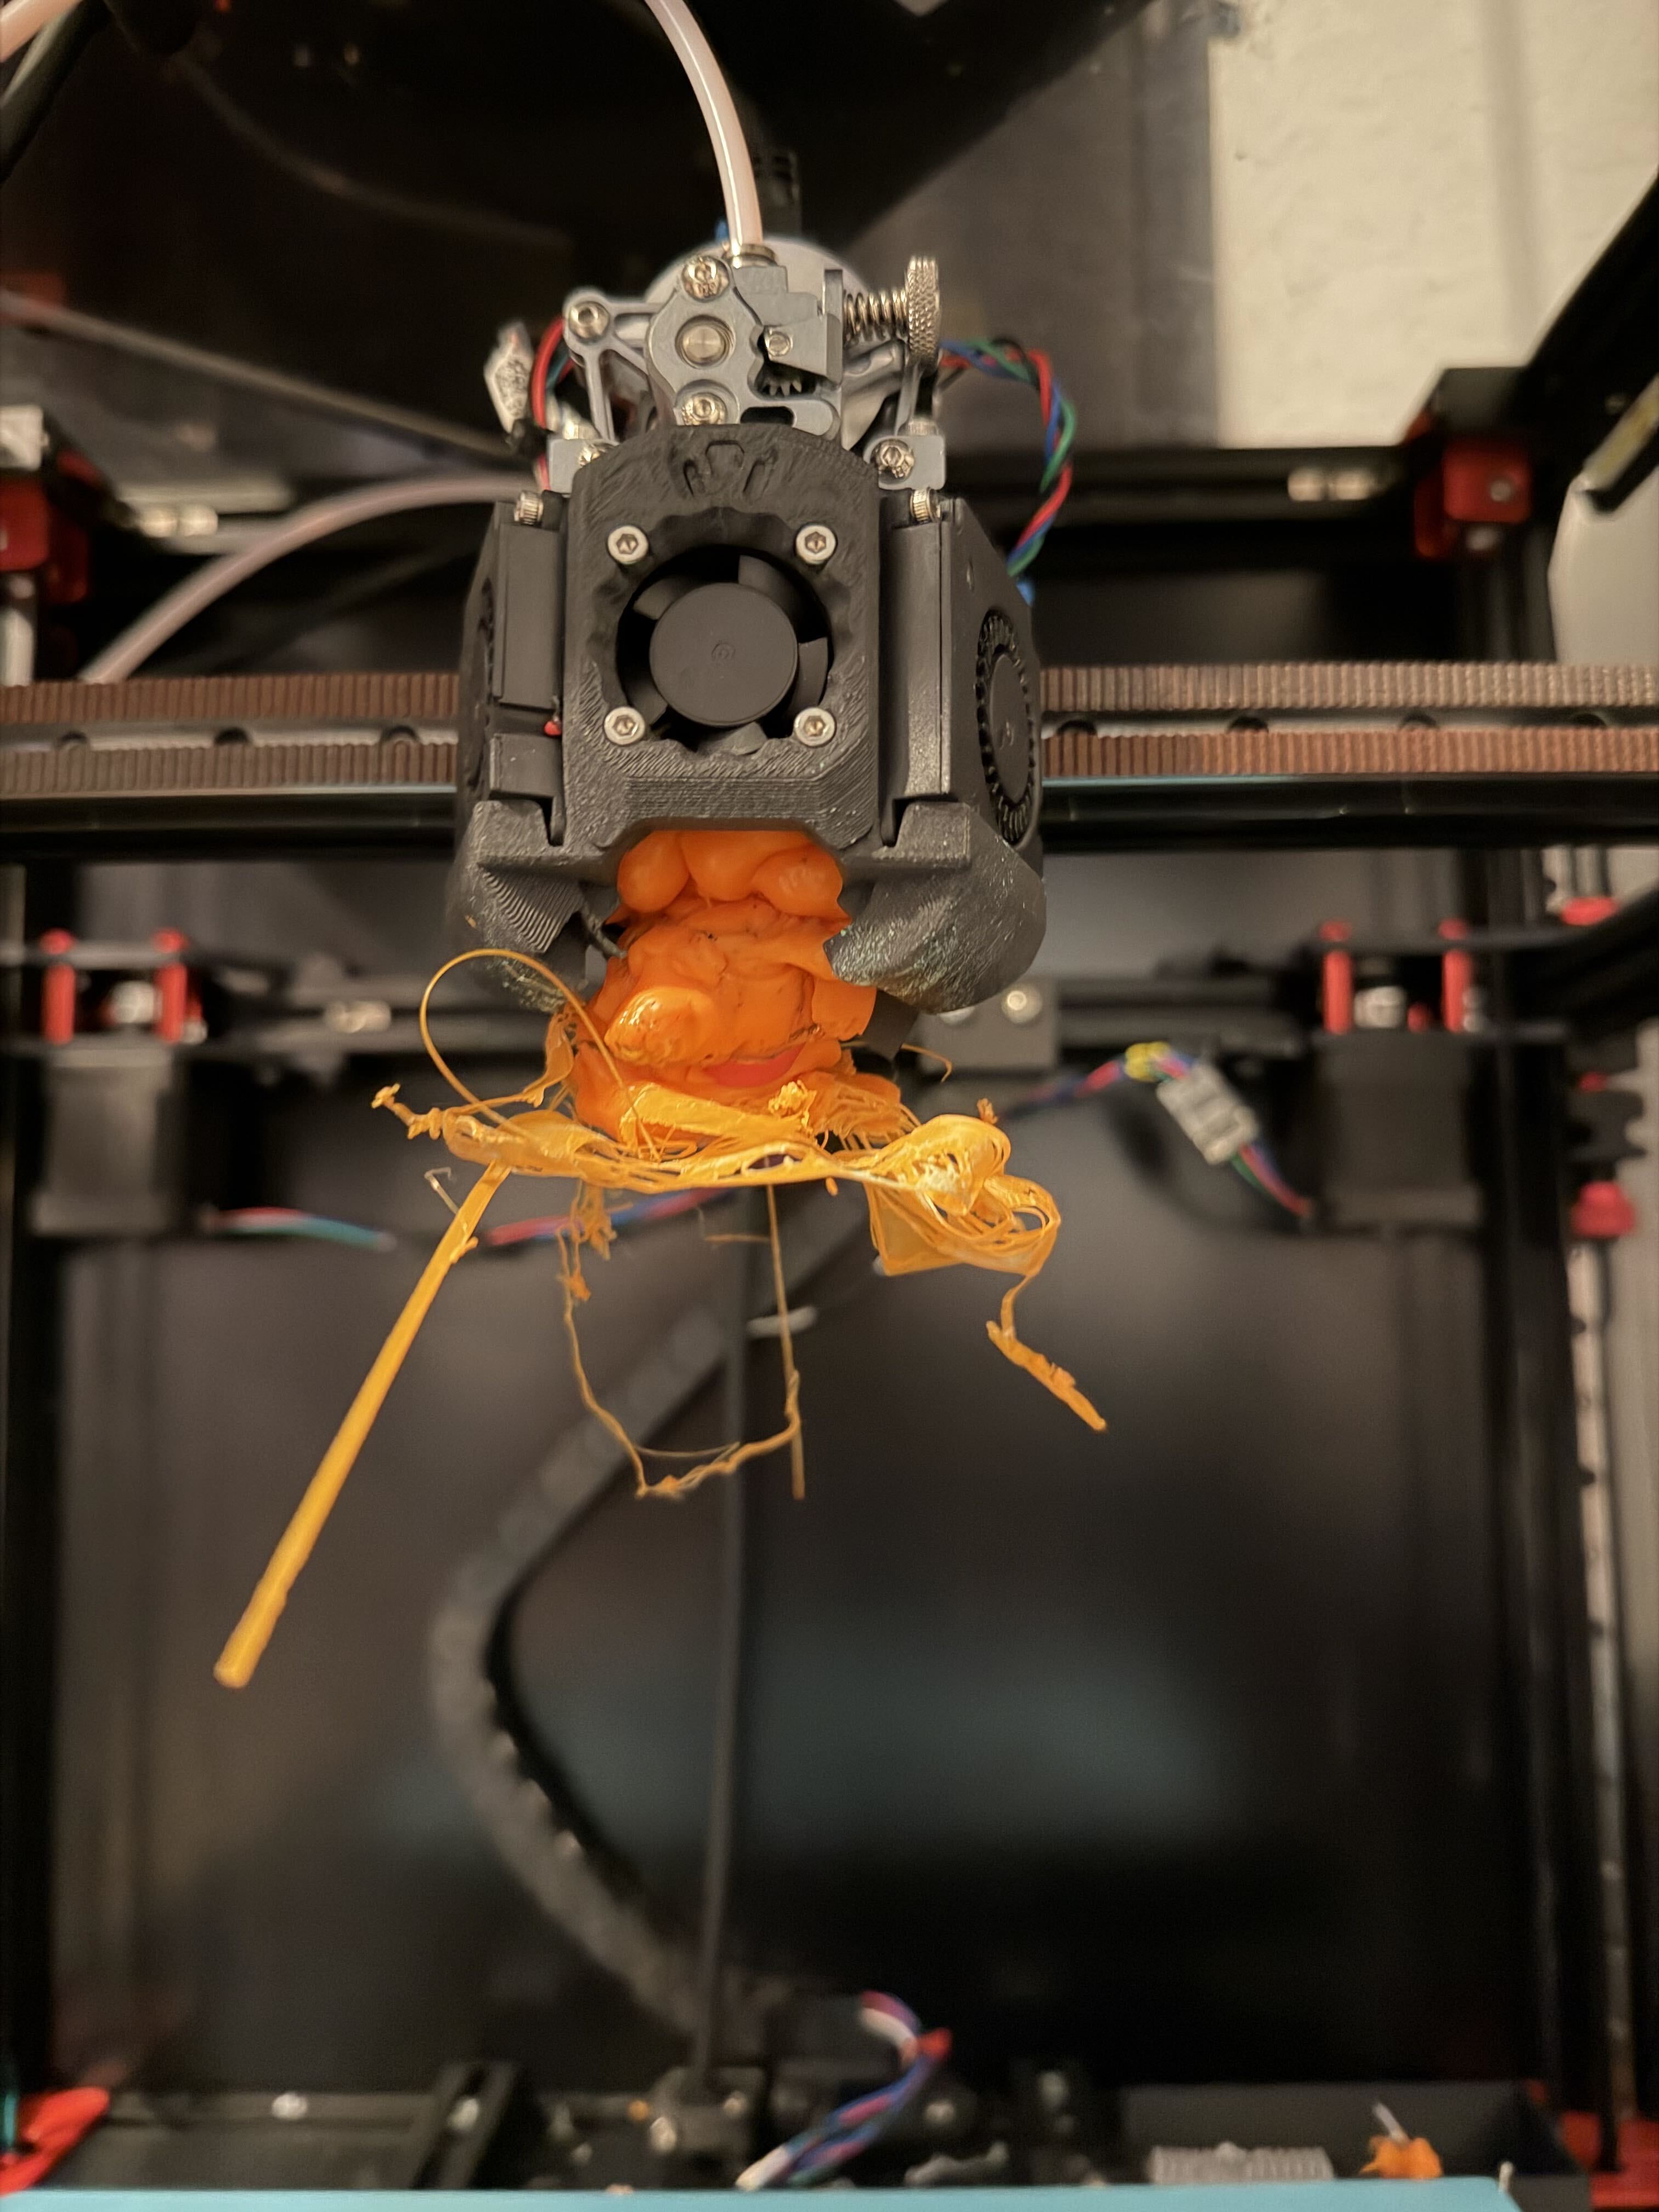
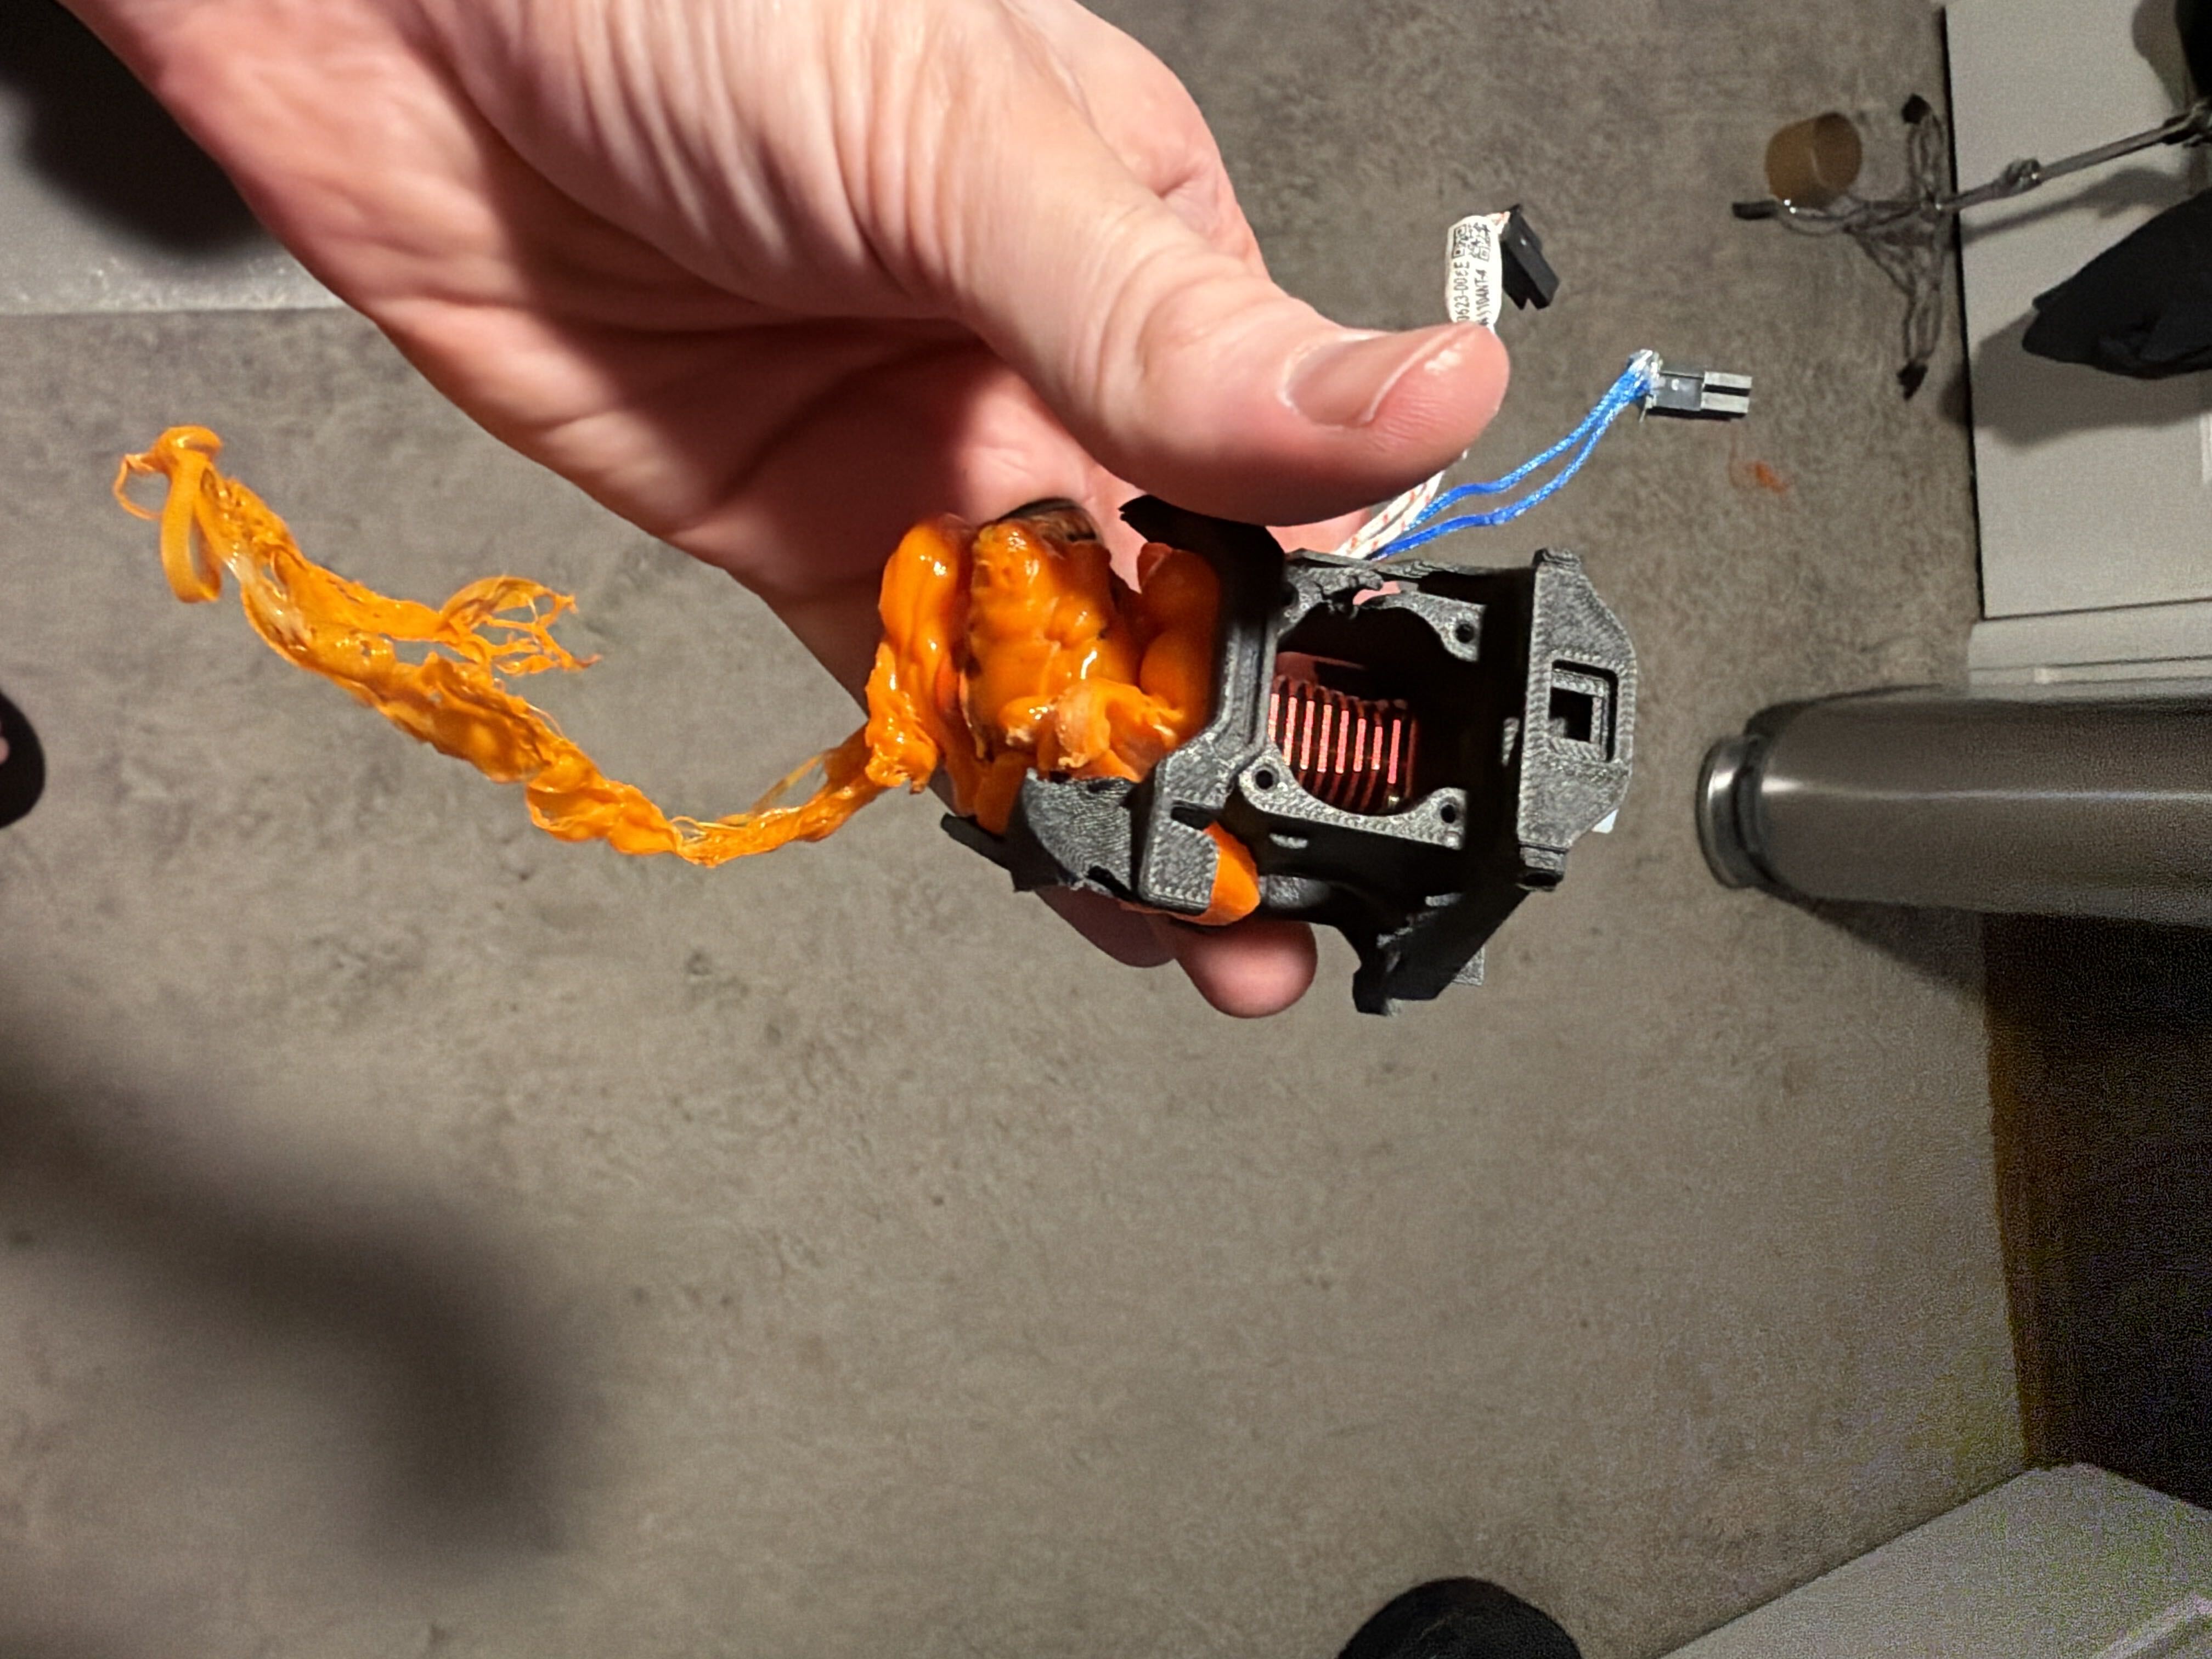
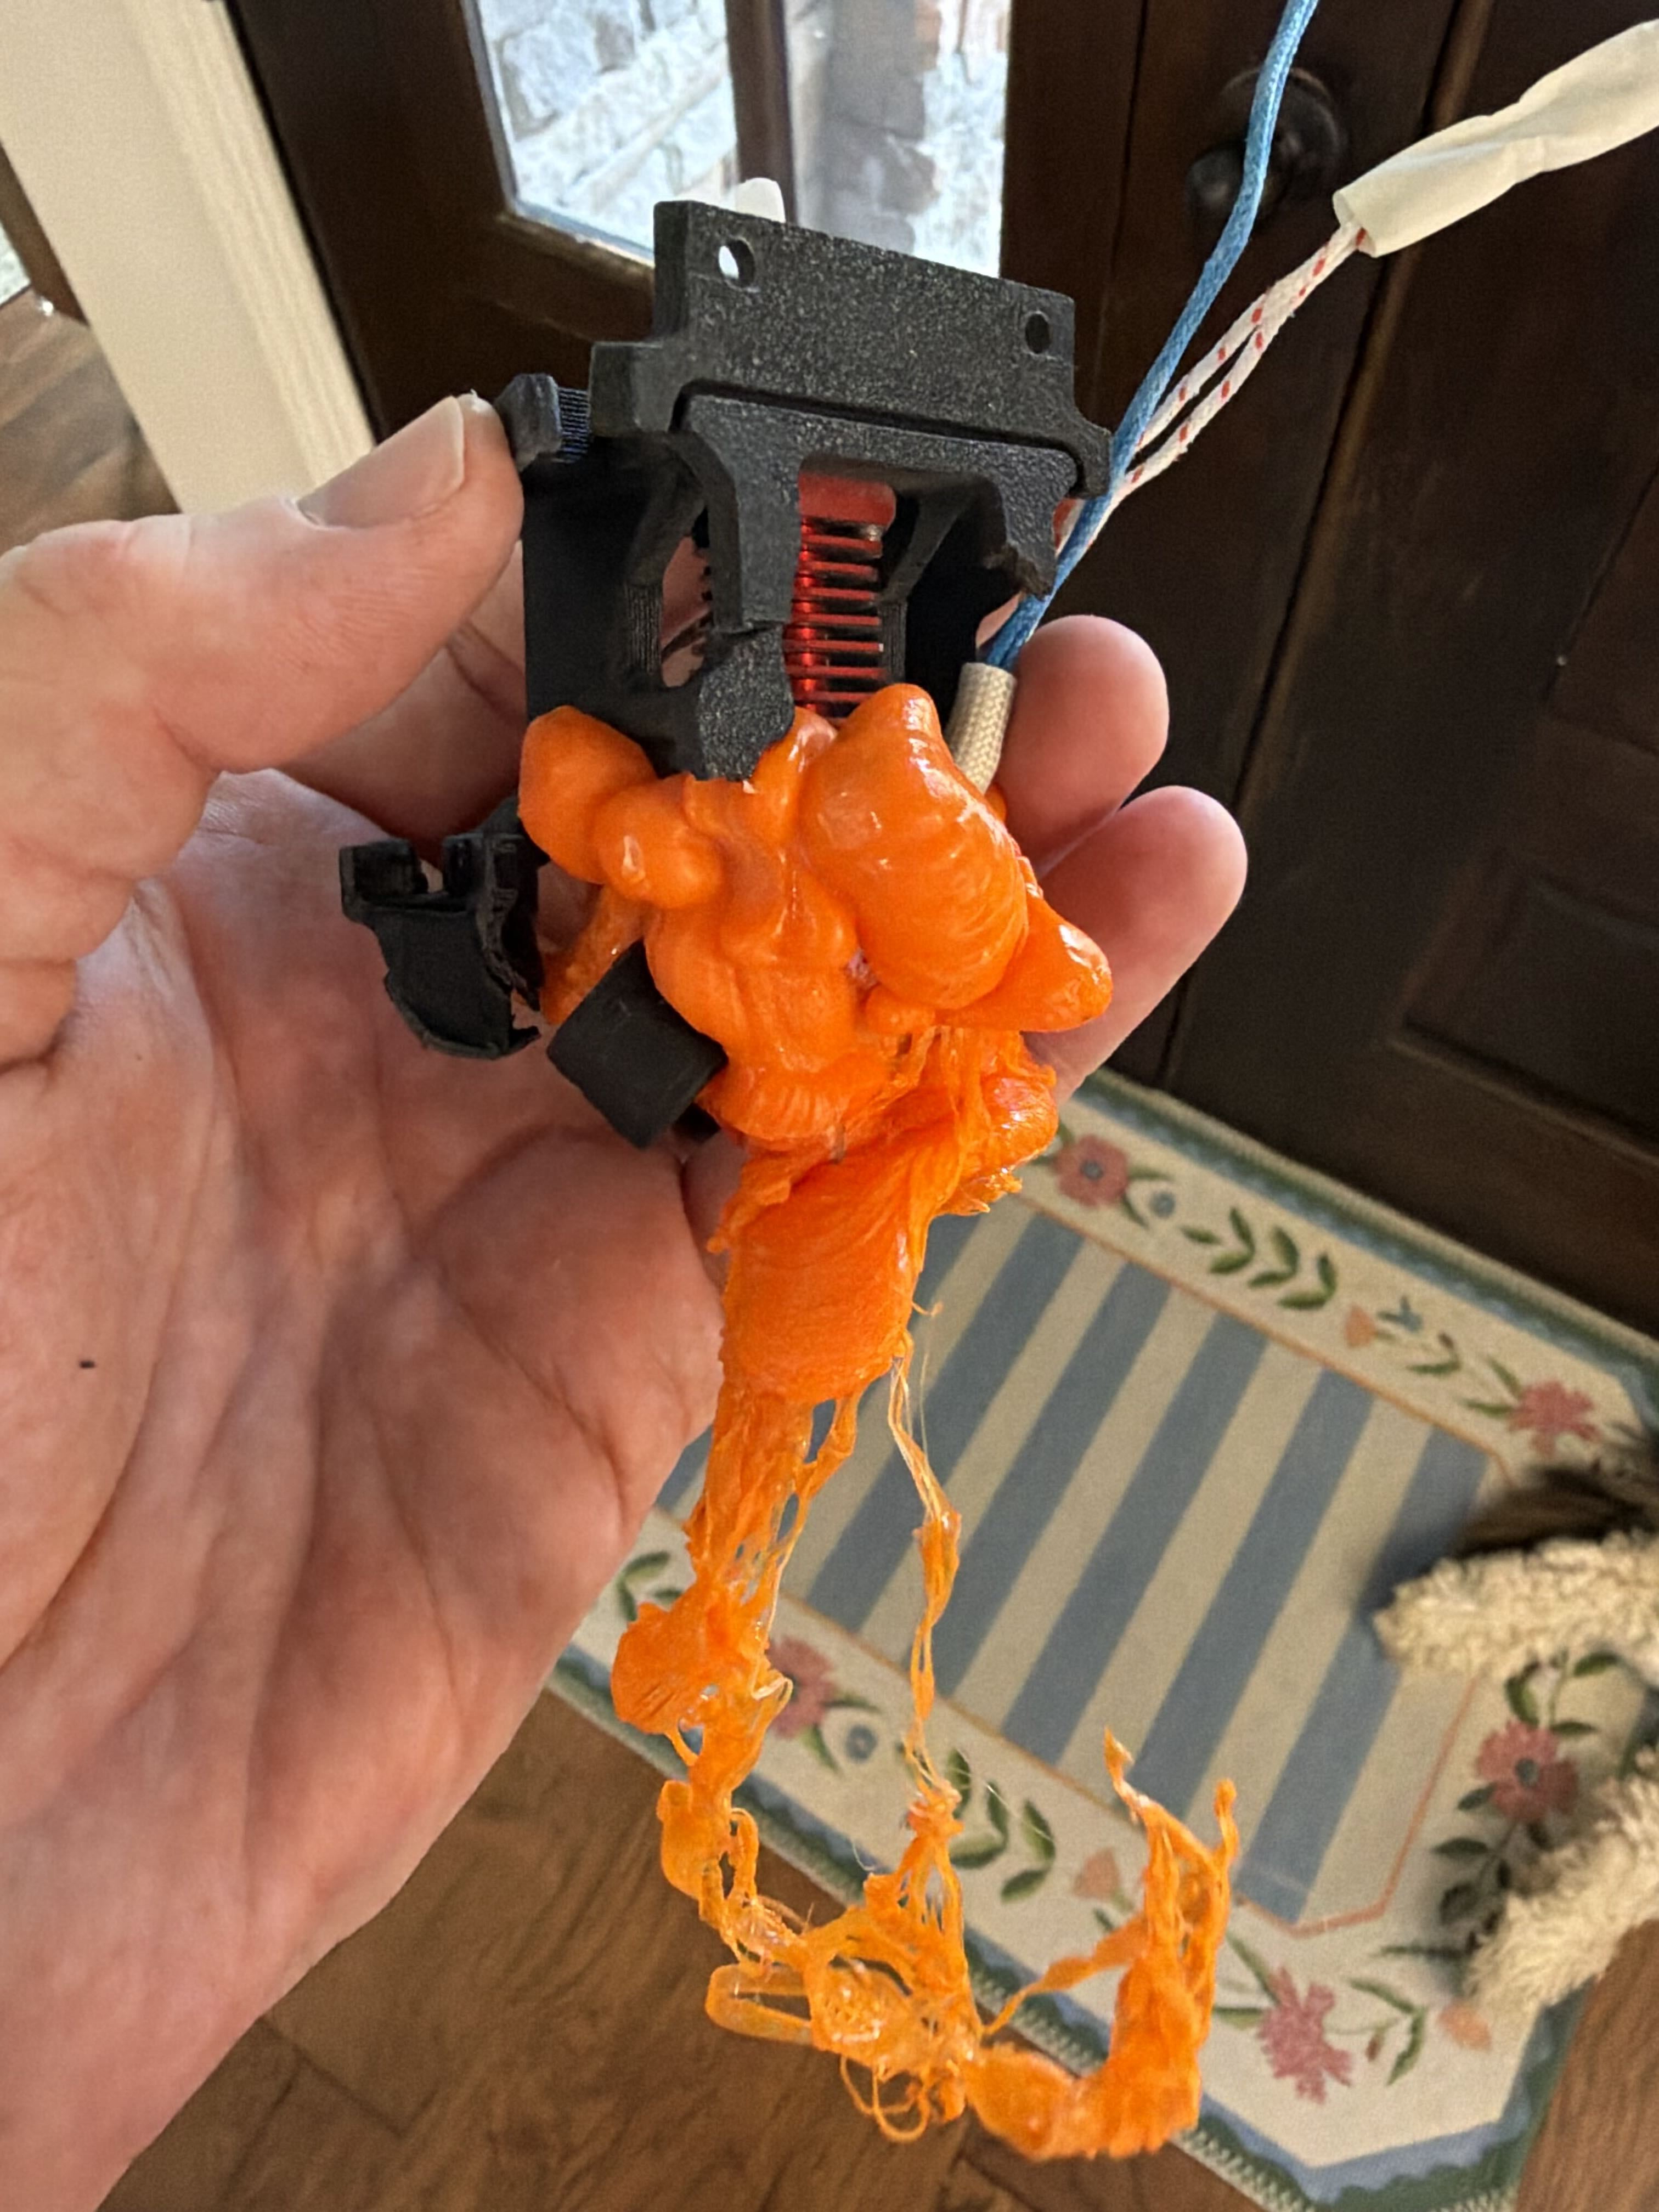
The Revo nozzle snapped (unfortunate, because it was a diamond nozzle) and broke the heating element clean in half. The whole bottom half was basically trash. I had to cut into the body just to get it apart, because the blob had melted its way into the screw housings.
I finished the job, but my most reliable open source printer was dead in its tracks. Everything had been working so well that all I really needed was to get the toolhead back in working order, then add some safeguards against another blob of death: a smart filament sensor paired with an extruder sensor, and a camera to catch spaghetti or blobs.
But something kept nagging at me. There was one thing the Bambu could do that my Voron couldn’t: automatic pressure advance.
Unlock number two: a strain gauge
There’s one device that’s supposed to handle this on other printers: a strain gauge. Prusa did it successfully on the XL with the Nextruder. I debated just putting a Nextruder on the Voron and calling it a day, but that meant a lot of electronics changes I wasn’t willing to make. All the requirements from before still stand. It should be user serviceable and replaceable.
bd_pressure came to the rescue. It’s a small, MIT-licensed strain gauge module that sits in the toolhead and measures extruder pressure directly. To calibrate, the extruder runs a controlled acceleration and deceleration sequence in free air, the gauge measures the force, and the module works out the pressure advance value and hands it to Klipper. No calibration prints. It can also act as a nozzle probe, and it plays nicely alongside an eddy scanner like the Cartographer.
I needed a toolhead board with enough I/O to run the Cartographer over USB and the strain gauge over I2C. Enter the Nitehawk SB v2: the same board I’d been running, but in the format built for the Stealthburner, with both USB and I2C. The catch is that it meant falling back to a toolhead with less than adequate cooling for the speeds I’d been pushing.
Reliability over speed. I started digging.
I tried a Revo, a Dragon, and a Bambu hotend, and ran several prints on the Dragon. In the end I went with the Bambu hotend. It came down to cooling and footprint: only the Bambu was small enough to fit the bd_pressure sensor inline. I found a model that would work.
Yes, the irony isn’t lost on me.
I did have to break one of my own rules: user replaceable. The hotend and thermistor wires are made for an actual X1C, not this, so I had to crimp new connectors and extensions to make it work. Not quite where I want it to end up, but fine enough to proceed.
I had several Stealthburners from past upgrades, so I grabbed a front face, installed the new fan setup, and got everything wired up.
First failure: the extruder. The Galileo 2 is an orbital extruder with a 9:1 gear reduction. I bought a kit, but in my infinite wisdom I took the pancake stepper from my Xol and jammed it in. Literally. It bound up almost immediately, and I couldn’t figure out why for an entire day. Eventually I learned that a default pancake stepper has an extra tooth on its gear, and there was no way on this earth it would ever mesh, let alone unbind.
Pressure advance on load
Once I sorted that out, everything came together. Pressure advance is a property of the filament, not the machine, so the moment you know it’s stale is when you load a new spool. That’s where the calibration lives now. LOAD_FILAMENT feeds and purges, then kicks off the tune:
# PA is a property of the FILAMENT, so a load is the one moment it is known
# to be stale. Measure it here rather than per-print: PA_TUNE costs ~2 min and
# leaves strands on the bed, which is unacceptable inside PRINT_START.
{% if v.auto_pa and printer.print_stats.state not in ('printing', 'paused') %}
    PA_TUNE NOZZLE_TEMP={use_temp|int} PRECHARGE={(purge * v.pa_precharge_mult)|round(1)}
{% endif %}
PA_TUNE wraps the upstream PA_CALIBRATE macro. It homes if needed, pushes 80mm of filament over the purge bucket so the melt zone is actually full, then lifts to 30mm and runs the sweep in free air. (At 5mm, the extrudate curled back onto the nozzle and made a mess.) The sweep starts pressure advance at zero and steps it up by 0.002 per pass until the gauge sees the filament force reverse, then picks the best value. The result gets saved so it survives a restart, and unloading the filament clears it.
The whole thing takes about two minutes and about 110mm of filament. The first run on PLA landed on 0.034, the same value my old Sherpa Mini and Revo setup ran.
Why it matters
So now this thing is a beast. It’s not where I want it to end up, but the progression continues.
This still matters to me because of the laws coming into play around 3D printing. New York put a requirement in its 2026 budget that printers sold in the state carry software that compares every print against a database of firearm parts and refuses anything that matches. California followed with AB 2047, which makes it illegal to sell a printer in the state without certified firearm blocking technology once an industry standard exists. That means scanning every job, false positives on anything that looks like a pipe or a hook, and a push toward locked-down firmware on machines that are supposed to be general purpose tools.
I might not be building custom printers for people to buy, but keeping my own ability to print is paramount for my own creativity. I don’t print guns, and I don’t want to be accused of it. Like it or not, it’s my Second Amendment right to have weaponry.
So why write this post? It’s another example of what I’m working on and why I’m doing it, and I want to show some pride. Several years of work went into making this machine what it is, and I’m proud of what I learned along the way. I dare say this work is what opened the door to my new job, which starts tomorrow.